Category Archives: Uncategorized

Catching the Rain

Last winter, January and February of 2011, the hard workers from Wick Buildings braved cold and snow to build us a shed that could house our equipment on the farm (previously we had been storing equipment in corners of rented sheds all over the township).

2011.1.30 028
Shed under construction.

In planning the shed, we made two major arrangements with future conservation efforts in mind. First, we situated the shed so that its ends face east and west, making for a large roof face toward the south – in case we ever want to put solar panels up there.

shed in use

Second, we asked our salesman from Wick to design the gutters so that they all ran to the same place at the west end of the building, with the idea that we might someday set up a rainwater catchment system from which we could irrigate our test garden crops (our grain crops are “dry-land” crops, meaning that they grow without irrigation).

mulching garlic

The west end of the building featured a big Y all last year, probably prompting our neighbors to ask “whY?” In 2011, all the rain that fell on the shed roof was spouted out the west end and into a little drainage field of rocks that we’d picked up from the fields.

A little history:

When we started working on this farm back in 2010, our irrigation system consisted of a small livestock feed tank on a trailer, covered by a piece of plastic:

irrigation tank

A larger-scale, more sophisticated system was soon developed: my dad got an old wagon at a sale, sold the box for scrap, and built a platform that would sit on the running gear. We got a used 750-gallon fertilizer tank for free, cleaned it very thoroughly, and installed it on the platform. Now we had a big water tank on wheels! Every once in a while we trundled it down the road to fill it from the well at my cousins’ house, keeping track of how much we used and paying them yearly.

watering in

The tank-on-wheels worked pretty well – we could pull it around to water all our tree plantings in the conservation/restoration areas on the farm (as my dad is doing above), and we set up a drip irrigation system for the garden that we could just plug in to the tank when the ground dried out between rains.

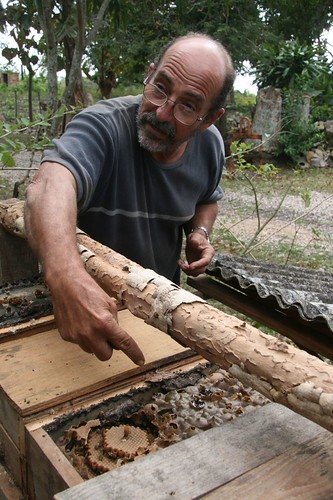
This winter when we went to Cuba, though, we saw several urban farms practicing the same kind of rainwater catchment we had been planning and talking about for years.

2012.1.25 cuba b 394Whenever people asked us whether we learned anything from the Cuban farmers that we wanted to use on our farm, we said, “Well, they’re actually doing a number of things that we are planning….” Like this:

Rainwater collection bin, collecting water from the roof of the business next door. We have big plans to implement a rainwater catchment system on our farm, but the collection container hasn’t been installed yet.

I guess we just needed to see it in action to spur us on.

A couple of weeks ago we ordered two 2500-gallon tanks from our local farm supply store. When we went to pick them up, the wind was rolling them around in the yard – despite the fact that they are 8 feet in diameter, 8 feet high, and weight 400 pounds each! We had to keep them in the shed until they could be installed, to keep them from rolling away across the field.

working on rainwater catchment systemAfraid that the weight of the full tank could cause a puncture on the bed of gravel where they would be placed, we made a little pad out of ag lime (which looks a lot like thick sand) for each tank to sit on.

My cousin Tom helped us maneuver the tanks into place, and we immediately put some bolts through the shed wall and strapped them to the shed with the same heavy-duty straps that truckers use to hold down loads on their flatbed trailers.

Then it was time for the plumbing. We had to make something that was secure enough to withstand the strong prairie winds (we have had 60 mph winds out here), but it also had to be flexible enough to avoid breakage in the wind or as the tanks settled on their sandy resting pads. It had to be able to handle a large volume of water at once. Any piping had to connect to 4″x3″ gutter downspouts, which were already attached to the building.

After many nights lying awake, drawing plans in his head, my dad hit upon a solution:

downspout redirection detail

A superstructure made out of untreated Douglas Fir boards (we don’t want those lumber treatment chemicals washing onto the garden!) holds the redirected downspouts as they come out from the building and separate to fill the tanks. The structure is held to the tanks, and the metal downspouts are held to the redirection pipes, by strong rubber bungee cords to allow them to flex.

Then we put in a second set of downspouts that bypass the tanks, for winter (when we don’t want water to freeze in the tanks and burst) or for times when the tanks are full. The metal downspouts are surprisingly flexible; the plan is to just unfasten the bungee cords and move them to the bypass spouts as needed.

2012.4.29 019

An overflow opening was drilled at the top of the tank – that’s the little black elbow that you see just under the board. We will attach additional downspouts from the overflow spigots in case of a heavy rain, so it doesn’t all just come out the top of the tank and cause erosion. Two-inch piping connects the two tanks at the bottom so that the water will equalize, in case there’s a major wind during a rainstorm and one side of the shed gets significantly more rainfall than the other. Soon, we will install a set of garden hose spigots at the bottom to which we can attach our drip irrigation system.

The structure was finally in place last Friday evening. That night, we got 0.4 inches of rain…which meant more than 600 gallons in each tank.

600+ gallons in each tank

Ta-da! It worked!

rainwater, caught!
Rainwater, caught!

Two inches of rain should fill both tanks.

What’s the big deal about catching rainwater?

When we use well water, we are slowly depleting aquifers (underground water reserves) and lowering the water table (making that underground water harder to access). As populations increase, more and more people need well water for drinking, and the pressure on aquifers also increases.

Additionally, folks who live in a town or city are using treated water when they water their gardens with city water – while it’s important to kill potentially harmful bacteria in water that we drink, plants don’t like the chlorine and other chemicals that’s used to do it. Besides, it takes a lot of resources to put water through that treatment process.

Using well water means using energy, both to pump the water out of the ground and to deliver it to our watering hoses. For most folks, that means pumping it through a city water system; for us, that means driving it a mile down the road from my cousins’ house. And energy costs money.

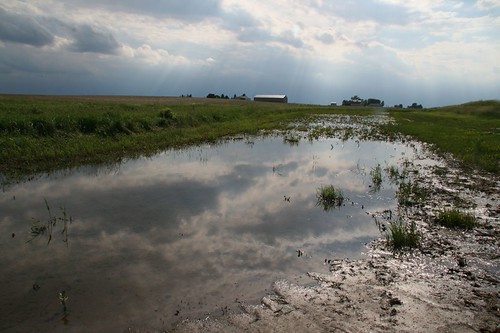
Buildings cause a different set of problems. When we build a building, a large area (in the case of our shed, 6,240 square feet) that used to absorb rainwater now just dumps all that rainwater into one place, often causing or contributing to flooding and erosion issues.

When we catch the rain that falls on our shed and then use it to water our garden instead of well water, we are decreasing flooding and erosion, increasing access to drinking water, decreasing our overall energy use, saving money, and growing healthier plants. We think that’s a big deal!

– Molly.

Winter Adventures to las Fincas y los Organopónicos de Cuba

We were fortunate to take the trip of a lifetime this January. My dad came upon Food First and its Food Sovereignty Tour to Cuba early last year and was intrigued. After months of debate, we decided to go as a family. After all, the tour was in January – perfect for farmers! We couldn’t pay for it out of our farm earnings this year, but I got a generous scholarship from the Green City Market that helped.

Titled Cuba Organic: Revolution and Evolution, this tour focused on visits to organic farms. We got to talk with farmers, researchers, and agriculture officials about Cuba’s abrupt and urgent agricultural transition to sustainable, non-chemical, local-input growing after the dissolution of the Soviet Union in 1990.

cuba trip map

Aboard a tour bus, we traveled almost the whole the length of the country in 12 days. We were among 12 tour participants from the United States, along with a Food First guide from the US, a Cuban guide, and a driver.

We visited 7 food-producing farms and at least as many community projects, including an exotic bird sanctuary, a botanic garden focused on ferns and orchids, and a community food preservation project. I came back inspired, with more than 1,300 photos and many pages of notes. Here are a few highlights:

2012.1.25 cuba b 436

One afternoon was spent working on an urban raised-bed vegetable farm, called an organopónico. Here, we transplanted chard and harvested tiny little round cucumbers. (My dad is the one bent over in the middle of the bed, wearing a white sun hat.)

Oxen and horses were widely used as draft animals on the farm, and we saw many horse carts and taxis used for transportation in the smaller cities. Knowledge about these animals had been all but lost in the country by 1990, but it was quickly re-learned and put to use when tractors, parts, and fuel became scarce.

2012.1.25 cuba a 155

2012.1.25 cuba a 486

Farmer Héctor Correa opened up his beehive so we could examine how these stingless tropical bees (not apis mellifera) build their hives – horizontally, as opposed to the vertical comb built by European honey bees.

Héctor and his wife Odalys were a particular inspiration to us because they focused on two main enterprises, mangoes and ceramics, but they also grew all their own food. They served us a meal that included not only their home-grown vegetables but also rice, pork, and coffee from their finca, or farm.

Of course, I sought out the grain and bean vendors at the agricultural markets we visited. This man was selling his corn whole, coarsely ground as cornmeal, and as fine masa harina. He also grew black beans and peanuts.

2012.1.25 cuba b 579

We visited both state-run and independent agricultural markets. The state-run market stalls offered a limited number of commodity crops (17 at one market, 21 at another) designated and subsidized by the government.

2012.1.25 cuba b 575

Prices were set by the state at those markets. At independent markets, there was much more variety, and prices were set by vendors.

These women were selling three kinds of beans. Prices at the markets were in the national currency, moneda nacional.

$1 (1 peso) in moneda nacional is about $.05 USD, so these black beans packaged in bags cost about fifty cents US – probably about 20 cents a pound.

Our most important take-home message was encapsulated on this sign at an urban farm called Organopónico El Ranchon:

2012.1.25 cuba b 376

It says, “Permaculture Design makes efficient use of: Time, Space, [and] Energy.” We vowed to use not just electrical energy, but also our own energy, more efficiently.

Parting shot:

2012.1.25 cuba b 452

We call this one “Breslin Cuban Gothic.”

More family photos from the trip.

Garlic Planting and other fall fun

September and October are the busiest harvest months on the farm if the weather cooperates. In addition to our own work, Dad has been helping out my uncle Johnny with his corn and soy harvest, driving trucks and running augers to move grain from place to place. With that harvest finally complete, we snagged a couple of beautiful days to plant more than 2,000 row feet of garlic.

Garlic Planting

We grew the garlic “seed” ourselves this year. It’s not true seed that we’re using – since garlic is a biennial, we are actually planting the individual cloves from the largest heads of this year’s garlic crop.

garlic seed

Several years ago we bought a mixed bag of garlic from an organic grower in the area, so we’re not sure exactly how many varieties we have. As you can see in the photo above, there seems to be quite a bit of beautiful variation.

planting garlic

The first step in the garlic planting process was to borrow a 5-foot tiller and use it to make some beds. We tilled the beds once in late September, and then we tilled the same spots again just before planting to soften the ground and kill the newly-sprouted weeds.

The strings, posts, and two-by-fours are an ingenious bed-planting alignment system borrowed from our friend Clare. It helped us make five neat rows in each bed. The newly-tilled ground was so soft that we could plant just by pushing each clove into the soil with our hands.

After about a day and a half on our knees, it was time to mulch. We got some untreated straw from a local farmer and forked out a thick layer over the beds. The mulch will insulate the garlic cloves over the cold winter months and suppress the weeds in the spring.

pitchfork action

We were definitely ready for our tea break after that. And maybe a couple of Tylenols to go with those organic apples.

tea break

Come next June and July, we’re expecting to harvest many pounds of scapes and about 5,000 heads of garlic!

Other Fall Fun: Beans, Wheat, Power, Prairie Grass, and Cover Crops

In other news this month, we finally got a couple of dry days to harvest our soybeans (below) and four varieties of dry beans.

soybeans

The waiting period was pretty stressful: we needed about three days without rain to dry out the bean pods and stalks so that they could go through the combine, and then a day or two to harvest them…and it rained about every 2.5 days for weeks on end.

The soybeans went straight to the local grain elevator (since we’re not yet certified organic, they have to be sold on the conventional market). We have had the edible beans tested, and we’re working on cleaning them for sale.

After the beans were out of the field, we planted 5 acres of hard red winter wheat and 8 acres of soft red winter wheat. Less than a week later, it had germinated:

wheat sprouts!

Hopefully we’ll see the green fuzz of new wheat plants in the field soon!

power!

Thanks to our new membership in the Corn Belt Energy Cooperative, we now have power on the farm. We longer have to run a noisy generator whenever we need to use a vacuum or a saw. This also means that we can start working on larger-scale grain storage options.

The tillage radishes that we planted in August after the sweet corn harvest have gotten huge. They’re definitely doing their job of breaking up the soil and creating deep-soil seepage pathways.

tillage radish

One of our major farm goals is to keep our soil covered at all times. We try to leave ground bare for no more than 3 weeks. In addition to the tillage radish, this year’s wheat ground is covered by red clover, the oat ground is covered by alfalfa, and the bean ground (as we mentioned) is now planted with next year’s wheat. No part of these plants will be removed from the farm – their job is to capture nutrients and store them for the next crop, along with preventing erosion, adding organic matter to the soil, improving soil water-holding capacity, and providing wildlife habitat.

We also noticed recently that some of the prairie grasses are starting to take hold in the prairie restoration area. Our NRCS biologist, Mark, says that he can identify both big and little bluestem among these grasses that are taller than we are.

tall prairie grasses!

Whew! Now that the harvest and planting are complete…well, we’re ready for some down time. We have plenty of work doing clean-up, putting the garden to bed, and preparing beans, wheat, and flour for sale to keep us busy for the coming months.

-Molly.

Flour and Farmers’ Markets

Nobody around here knows what to do when we say that we grow grains for people to eat. The local U of I extension office couldn’t tell us how to get a protein or falling number test (something bakers want to know) – all they could tell us where we could learn the “feed ration value” of our wheat. There are plenty of feed mills, but the nearest commercial food mills were several hours away. They only mill soft wheat…and we grew hard.

hard red winter wheat, nearly ripe
Photo courtesy of Ms. Natalie Sukhaphadhana.

After much research and many emails sent into the void never to return, I finally found someone who was willing to do custom milling for us! His name is Roger, and he runs Rogers Creek Grist Mill in Milledgeville, Illinois (how very appropriate!).

Roger's Creek Grist Mill

Roger built this mill because he was fascinated by the engineering behind water power. Though it’s not built on a creek (because he didn’t happen to have one handy), he set it up so that he could use water to power the wheel and turn the mill. It is a demonstration site, open for visitors and school tours – but it’s also a working mill. He mills grains for his own line of pancake and muffin mixes on this Meadows Mill built in 1922:

Meadows Mill from the back

The mill is a stone mill, and the twenty-inch stones still have to be taken to the factory in North Carolina for sharpening every few years. Roger uses electricity to power the mill for work-a-day use. He put it to use for us one day last month.

Breslin Farms flour!

sourdough pancakes from our wheat

pancakes & local honey

We ate that first handful of flour in some delicious sourdough pancakes with some freshly-harvested local honey. (The bees were building comb where it didn’t belong, and this jar was the sweet, sweet collateral damage.)

We’ve had reason to make the drive to Milledgeville several times since that first visit a couple of months ago. In addition to orders from our vegetable-growing friends at Tempel Farms Organics, who included our flour in their CSA shares, we were also invited to be a guest vendor at the Green City Market in Chicago this month. They host a program called the Locavore Challenge, during which market patrons can pledge to eat only local food for two weeks. Since there are few grains or beans available through regular market vendors, Bread made from our flour! they asked us to help them close the gap by making the staple crops we grow available at the market. We’re mid-way through right now, and we’re enjoying it greatly. It gives us renewed energy when we talk to people who are excited about what we’re doing.

One of our customers, Lauren from Peerless Bread & Jam, created a bread recipe using our wheat that we can give to customers and even baked some loaves for samples (right). Yum. Thanks to Lauren for the photo, too!

My dad made it up to the city to hand out samples and advice to customers last Saturday. He sold quite a bit of product, too!

saturday product line

Doesn’t the market stand look great? Stop by and see us there – we’ll be at the market on Wednesdays and Saturdays through September 21st. We have also been going to a market at the Whole Foods in Naperville on the second Sunday of the month, and our last market there will be October 9th.

– Molly.

Sweet corn season’s come and gone.

Our acre of sweet corn was the first thing we planted to test out our new row crop planter this spring. Sweet corn is always a short crop compared to field corn and other crops, but this season seems to have gone by even faster than usual! This year, we chose a 75-day variety called “Luscious.” Yum.

Planted on May 24, this photo of the new corn sprouts was taken on June 6.

sweetcorn sprouts

One month later, July 6, the dew-laden plants looked beautiful in the early morning light.

corn in the morn

new silks

By July 19, the silks (above) and tassles (below) were out. Silks are the pollen receptors: each strand, if it’s pollinated, will become one kernel. As you can see in this photo, tassles are the framework for the tiny flowers whose pollen will rain down on the silks.

corn tassles

Then all of a sudden, the corn was head high and we were picking 80 to 100 dozen ears a day! Pictured below are some of our sweet corn picking crew who live on the farms surrounding ours. Sweet corn picking starts at 6am and usually ends by 9 or 10. This was nearing the end of our picking season, August 6.

sweet corn pickers

Our corn (and wheat berries!) were advertised as part of the Montalbano Farms CSA share at the Logan Square Farmers Market on August 7. One day turn-around, from field to customer!

2011.8.11 001

Many ears were also sold by our friends at Sweet Home Organics in St. Charles – along with wheat grass that our friend Lia grew from our wheat berries.

sweet corn and wheat grass
(Thanks to Kim for this photo.)

We finally mowed down the remaining stalks on August 11.

mowing sweet corn

Wow, that happened fast!

Next year, we hope to be able to plant a few smaller batches, spacing them a week or two apart. We want to eat sweet corn for a whole month! Added bonuses will be a reduction in the risk of losing the whole crop due to weather or pest pressure, and elimination of the stress of picking a whole acre at a time. We’re learning something new every day.

– Molly

Luscious

Luscious sweet corn ears are a beautiful bicolor, the plump kernels a mix of white and yellow. When the colors are subdued early on in the season, this coloration is sometimes called “peaches and cream.” They taste delicious – buttery and sweet, even raw. Our favorite way to eat sweet corn is to boil whole ears for 3 minutes and then roll them in butter, salt, and pepper. That’s luscious, all right.

First* Wheat Harvest

*We did harvest wheat last year – with a scythe. Then we threshed it with a modified chipper/shredder and used a winnower made with an old furnace fan. That was on a quarter of an acre. This year, we did things a little differently for our twenty acres of hard red winter wheat.

Our “new” combine arrived on July 7th on a truck with “Oversized Load” signs all over it.

new combine arrives!

I call it “new” because it’s older than me – it dates from 1979, and the head (the piece that goes on the front) was made in 1978. But it’s in very good shape, and it’s new to us! And very exciting that we got it just in the nick of time to harvest our winter wheat crop.

There was one very exciting moment in the process of unloading – the head is so big that before it was properly situated, it lifted up the back wheels of the forklift. Fortunately, the delivery driver and my dad think fast.

up on two wheels!

This combine is also “small” – it has a 16-foot head, so it can harvest a swath 16 feet wide at a time. More modern combines harvest 30 to 40 feet at a time or more. Standing next to it, though, it sure looks big.

A few days later, after many hours of studying the operator’s manual, adjusting settings, and greasing fittings, we finally had a nice dry day and enough confidence to give it a try. It worked!

a little help

Uncle Johnny rode the first round along with my dad, giving him pointers. Wow, there are a lot of moving parts on that machine.

moisture tester

After the first round, we had to stop and test the moisture of the grain with this tester (left).
checking the moisture
We were hoping for a 13.5% moisture content, but it tested at about 14.5%. We were anxious to get it harvested before the weather changed, though, so we went ahead.

A break for explanation:

This harvesting machine is called a “combine” because it does a combination of things: it reaps (cuts) the crop, threshes the grain by breaking it out of the hull or husk or pod, and then winnows the grain from the chaff. If this all seems like terminology you last heard from the pulpit, that’s probably because there are a lot of farming parables in the Bible – in fact, this Sunday’s Catholic gospel was chock full of them. Someone in charge of setting up the readings must know it’s wheat harvest time. (Too bad we can’t blame the weeds in our field on an enemy!)

the head, up close and in motion

Here you can see the head doing the reaping – if you look closely just below the lowest black horizontal bar, you can see a bunch of zig-zag cutters moving back and forth (very sharp, and very fast), cutting off the wheat stalks as we drive through them.

The reel (the black part that turns) pushes the stalks into the augur, which is the green drill-bit-looking part. The augur moves the grain toward the opening in the center, where it’s pushed in to the thresher.

From there, it goes through the winnower, which is basically a fan that is precisely set to let the grain fall down while blowing away the rest of the plant materials.

augur in holding bin

The grain comes out an augur into a bin up on the top of the combine, behind the operator’s seat (left).
tailings
Everything but the grain – the chaff – is blown out the back. I’m holding a handful of these “tailings” in the photo on the right.

When the bin is full, it’s emptied into a waiting grain truck with yet another augur:

unloading grain

We took most of the wheat to a local grain elevator, but some 200 bushels went to Kaneville Feed & Seed to be cleaned to food grade.

emptying the truck at the cleaner

Now it’s available for sale! If you’re on the fence, check out some of these mouth-watering recipes.

beautiful!

combine dramatis

– Molly

Name That Weed!

Yep, it’s that time of year again. A number of misplaced, unloved, volunteer plants are growing on the farm like…well…weeds. We’ve hired a couple of local high school students to “walk beans” with me, and as we walk the rows with our hoes in hand, I try to teach them the names of the plants we’re systematically killing. Here is a handful of the most common weeds on our farm:

Velvet weeds are my aunt Mo’s favorite weed because, she says, “You always get the whole root when you pull it.” They’re kind of heart-shaped, and when they get big a fine little velvety fuzz covers them.
velvet weed

Ironweed is the local name for giant ragweed. I am so allergic to it that when it scratches my skin, I get huge welts. (The leaves have five fingers, so sometimes uninformed folks trying to start trouble think that it’s marijuana. As far as I know, this plant will not get you high. It may give you congestion, the sneezes, and itchy eyes, though.)
ironweed

You probably all know the pretty spring dandelion – they’re not pretty any more. Bah, humbug.
dandelion

lamb's quarters

The leaves of lamb’s quarters (left) have white undersides – presumably like a lamb’s haunches. They are tough to pull out!

pigweed

What we call pigweed (right), is actually an amaranth plant. They’re often nearly the same color as the bean leaves, which makes them hard to spot.

grass

This grass (left) probably has a special name, but I just call it “that dang grass!” It seems to have a special talent for growing right in next to the stem of a bean or corn plant, so we have to reach down and pull it by hand instead of getting it with the hoe.

sedges

The pale, bright green of these sedges (right) is a lovely color in the spring. They tend to grow in the wet areas, especially around the drip irrigation section in the vegetable test plot.

Trying out the new planter.

The drill is used for planting what’s called a “solid stand” – usually a grain. For corn and dry beans, we needed yet another new piece of equipment, a row crop planter.

planting sweet corn

As usual, this one also required a lot of attention before it got its first run around the field. A Deere 7200 6-row vacuum planter (purchased used, of course), it requires two hydraulic hook-ups. Unfortunately, the tractor we’re borrowing from my uncle Johnny for this purpose only has one place to hook up hydraulic hoses. So, my dad and our intrepid friend Butch figured out a way to make it work by adding all these black boxes and hoses:

working on hydraulics

(For the mechanically inclined: that’s a PTO-driven hydraulic pump, with a hydraulic fluid reservoir and a hydraulic oil cooler with an auxiliary fan.)

There was also a computer to hook up to it. Fancy, right? Each seed box (the yellow things on the back) have what’s called a “meter” at the bottom, with a changeable seed plate and a bunch of small adjustable controls. Below the meter is a tiny sensor that tracks whether seeds are moving through, and how fast. So when he’s planting, my dad can watch the computer monitor to see whether he’s planting at the right rate, when the seed is getting low, etc.

studying the computer
John watching the computer monitor while trying out the planter for the first time on sweet corn. It’s hard to watch the screen and drive a straight row at the same time! Fortunately there’s not much traffic on the field, so he just has to worry about how it will look after the crop comes up.

sweetcorn sprouts
Sweet corn sprouts. The planter worked!

It worked on the sweet corn, and we didn’t have to make too many upgrades and modifications before planting our four varieties of edible dry beans, and then soybeans.

planting beans

Shortly after this picture was taken during the bean-planting, however, the tractor (a Deere 4010) we were borrowing started having trouble. The battery kept dying, and then when we jumped it with the pickup truck, it sometimes wouldn’t throttle up enough to go. Finally we figured out that we were asking more of this beautifully-maintained 1964 tractor than it was designed to handle – both the fan and the computer were drawing down the battery, and the alternator couldn’t keep up. We unplugged those electronics and finished up as quickly as we could before the rain.

Now, two days and 2.9 inches of rain later, the calypso beans are starting to emerge!

-Molly

The “Other” Projects: Garden, Orchard, & Bees

We found a little time this month between oats and sweet corn to work on a couple of our fun, experimental farm projects.

Garden:

We have been planting a vegetable garden together for many years (my dad started me planting green beans as soon as I could walk), and it has finally outgrown the back yard. Last year we put the hardiest crops out on the farm: potatoes (we are mostly of Irish descent, after all), onions, leeks, peppers, and a couple of beds of beets. This year, we again started far more plants than we could fit in the home garden, so we are testing several new crops to see how they do out on the windy prairie.

soil blocking

Here, we are transplanting seedlings that we started indoors in soil blocks, moving them into bigger blocks. Soil blocks are an alternative to all those pesky plastic trays that have to be thrown out after only a couple years of use. The little metal tool I’m using in these photos compresses very wet potting soil into a cube that holds its shape and can be used just like a pot for several weeks or even months before outdoor planting.

Only peppers and tomatoes are transplanted like this, because they can’t go outside until relatively late in the season – all other crops are seeded into small (1.5″ or 2″) blocks and then planted directly out in the garden.

squeezing out the blocks
Transplanting peppers that need some tender loving care because they were attacked by a pest in our outdoor heated low tunnels.

tomatoes
Tomatoes trellised with the Monterey Basket Weave technique. The red-winged blackbirds love having a high perch to sing their “oka-lee” song.

The farm garden this year will include the potatoes, onions, leeks, and peppers that did well out there last year, as well as experimental rows of cabbages, kale, chard, and tomatoes…and maybe more to come!

Orchard:

Three quarters of an acre near the lane and shed have been set aside as a small orchard, an area dedicated to edible perennial plants. It is a work in progress: we just planted the first fruit trees and berry bushes, and we hope to add to it gradually over time. Like the vegetable garden, when these plants bear fruit (some as long as five to seven years from now), they will be in fairly small quantities that may in the long term be a source of supplemental income.

Empire / M.7
Eight apple trees and a sweet cherry will be planted in the orchard this year, and a handful of newly-grafted trees will stay in the home garden for protection until they are a bit larger.

blueberries
Four high-bush blueberries and eight different varieties of raspberries came or are on the way from Backyard Berry Plants in Indiana. Some had berries on them already!

Bees:

Sadly, the colony of honey bees that I kept in the back yard last year did not survive the harsh winter. In talking with other area beekeepers, I learned that the overwinter survival rates seem to hover around 50% in recent years. So, undaunted, I cleaned out the hive, ordered more components, and installed two new queens and their coteries out on the farm this month.

introducing new bees to their hive

I was having a hard time getting the bees out of their transport package, and I was worried because rain was on the way. Finally, I strapped the package to the top of the hive between the inner cover and the outer cover so that the opening in the package box lined up with the hole in the inner cover. I stopped stressing about it, and the ladies figured it out in no time.

hives at sunset
New hives in their new home.

– Molly

Wetland Restoration

after a week of heavy rains

This photo was taken last spring (2010), after a week of heavy rains. The water had actually subsided somewhat by this time – a few days earlier, this whole field had been at the bottom of a flowing creek. The view spurred serious contemplation of the feasibility of cropping this field; it had always been planted in the past, but its yields were significantly lower because of the occasional flooding and general dampness.

We considered our farm goals and decided that this might be an opportunity to create a space for increased biodiversity on the farm. We visited our local NRCS office to see if they could help us design a plan that would meet several goals at once:

  • decrease flooding (or at least keep it from spreading)
  • slow down flood waters to decrease erosion,
  • create more “edges” (places where one kind of habitat meets another),
  • provide a good food source for both native pollinators and honey bees throughout the season.

Our NRCS agent/biologist, Mark, brought the state forester in for a consultation that eventually helped us develop a wetland rehabilitation / wildlife habitat program that included planting three kinds of native trees and six native flowering shrubs – a total of more than 350 new seedlings!

Tree Planting Volunteer Day

We planted about 2/3 of the shrubs and a few trees last fall with our friend Nobie, and this spring we put out a call for help with the remaining planting of ~300 plants. To prep, we mowed (so we could see the ground under the dandelions), laid out the rows with flags at the recommended spacing, and rented a Bobcat to drill the holes so we wouldn’t break our backs.

during
The whole field seen from the hill near the road.

machinery saves the day
John got to be an expert at using the auger to drill holes.

We found out just a few days before the planned work day that our native plant supplier had his greenhouse blown down in the Great Blizzard of 2011, and most of the trees he was growing for us didn’t make it through the winter.  Yikes.  But then only two volunteers were able to make it out to the work day, so we rustled up about 130 trees and shrubs of the right varieties, and it worked out perfectly.

planting a tree
Emily (left) and Kat (right) hard at work planting a hackberry tree.  Okay, okay, this photo was staged after we’d finished planting – we were just too busy to stop for a photo-op!

Shrubs planted this time around included choke cherries, serviceberries, red osier dogwood, and nannyberries. Along with the hazelnuts and elderberries we had put in last year, these should be a major source of nectar for pollinators.  We also planted about 65 hackberry and swamp white oak trees, to join the few native Illinois pecans that we planted in the fall – many more of these to come!

em, working hardfrog! (or toad?)

Emily (left) worked hard for her money (or her meals, in this case), and Kat (right) found a frog (or maybe it’s a toad?). Sadly, there was no re-enactment of the “Frog Prince” fairy tale.

watering in
While Molly, Kat, and Emily laid out and planted the trees and bushes, John took charge of watering in each new plant with our mobile tank.

All in all, we planted over 130 trees in three hours and had time for a sumptuous lunch generously provided by the farm cook. Thank goodness for volunteers!

Addendum:

Mark arranged for us to get the rest of our swamp white oak and Illinois pecan trees for free from the state nursery in Topeka, Illinois, and I went down the next week to pick them up in my little car. Hopefully we’ll be planting those last 150 trees this week.

nursery entrance
The Horner Tree Nursery was a really beautiful place – I wish I’d arranged to take a tour while I was there.